


VFX Lens Distortion Grid
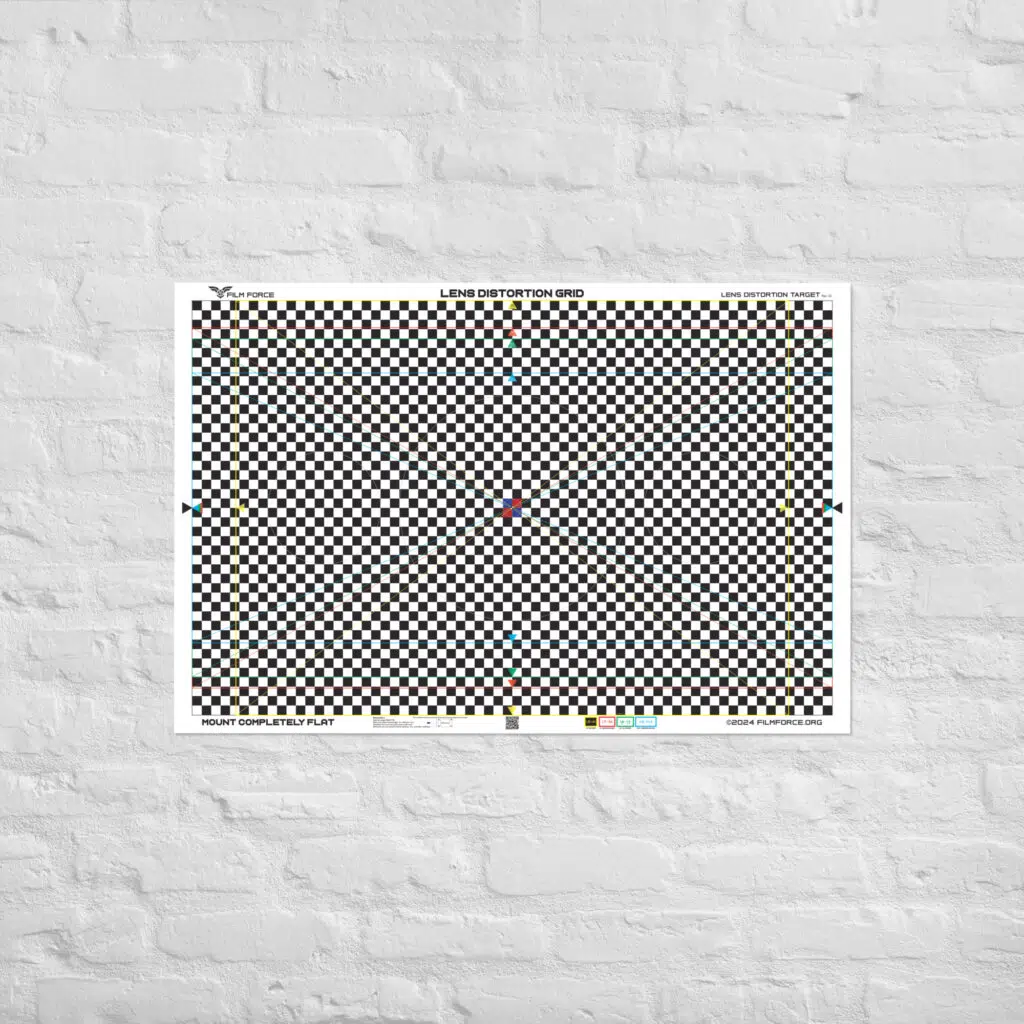
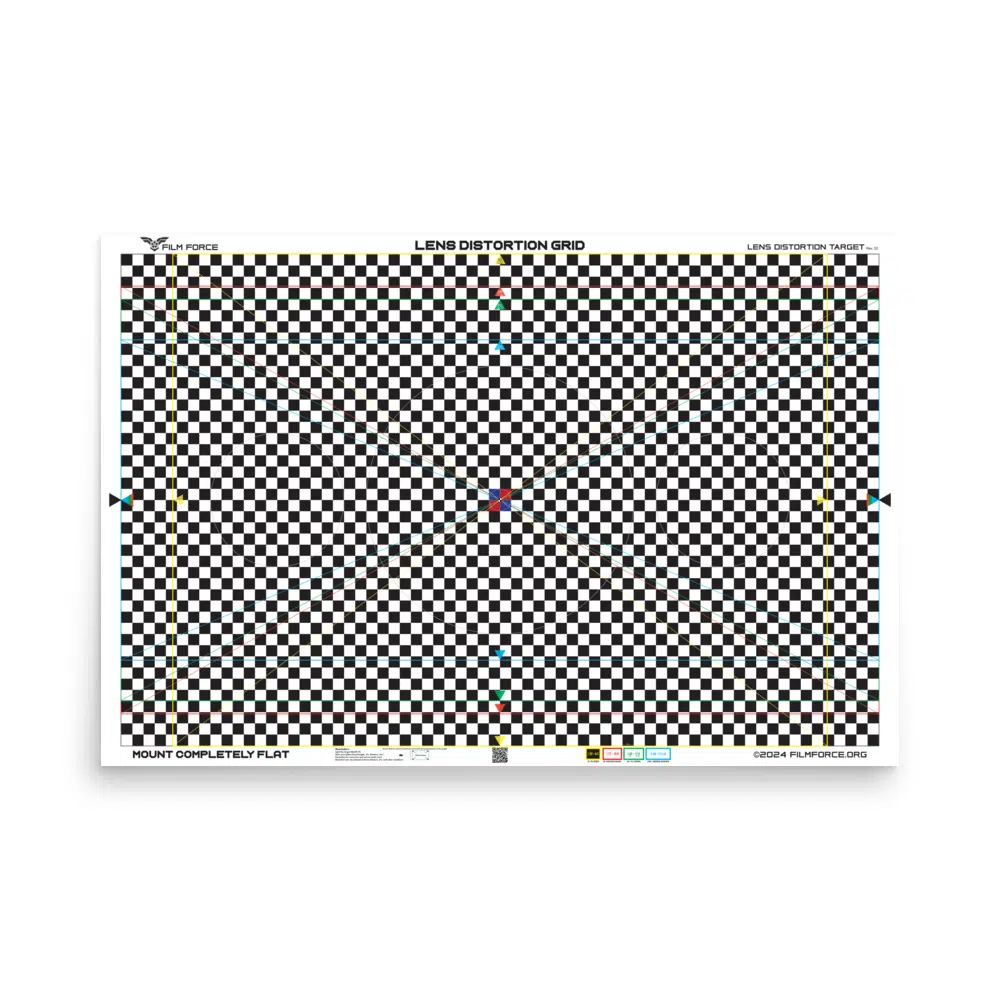
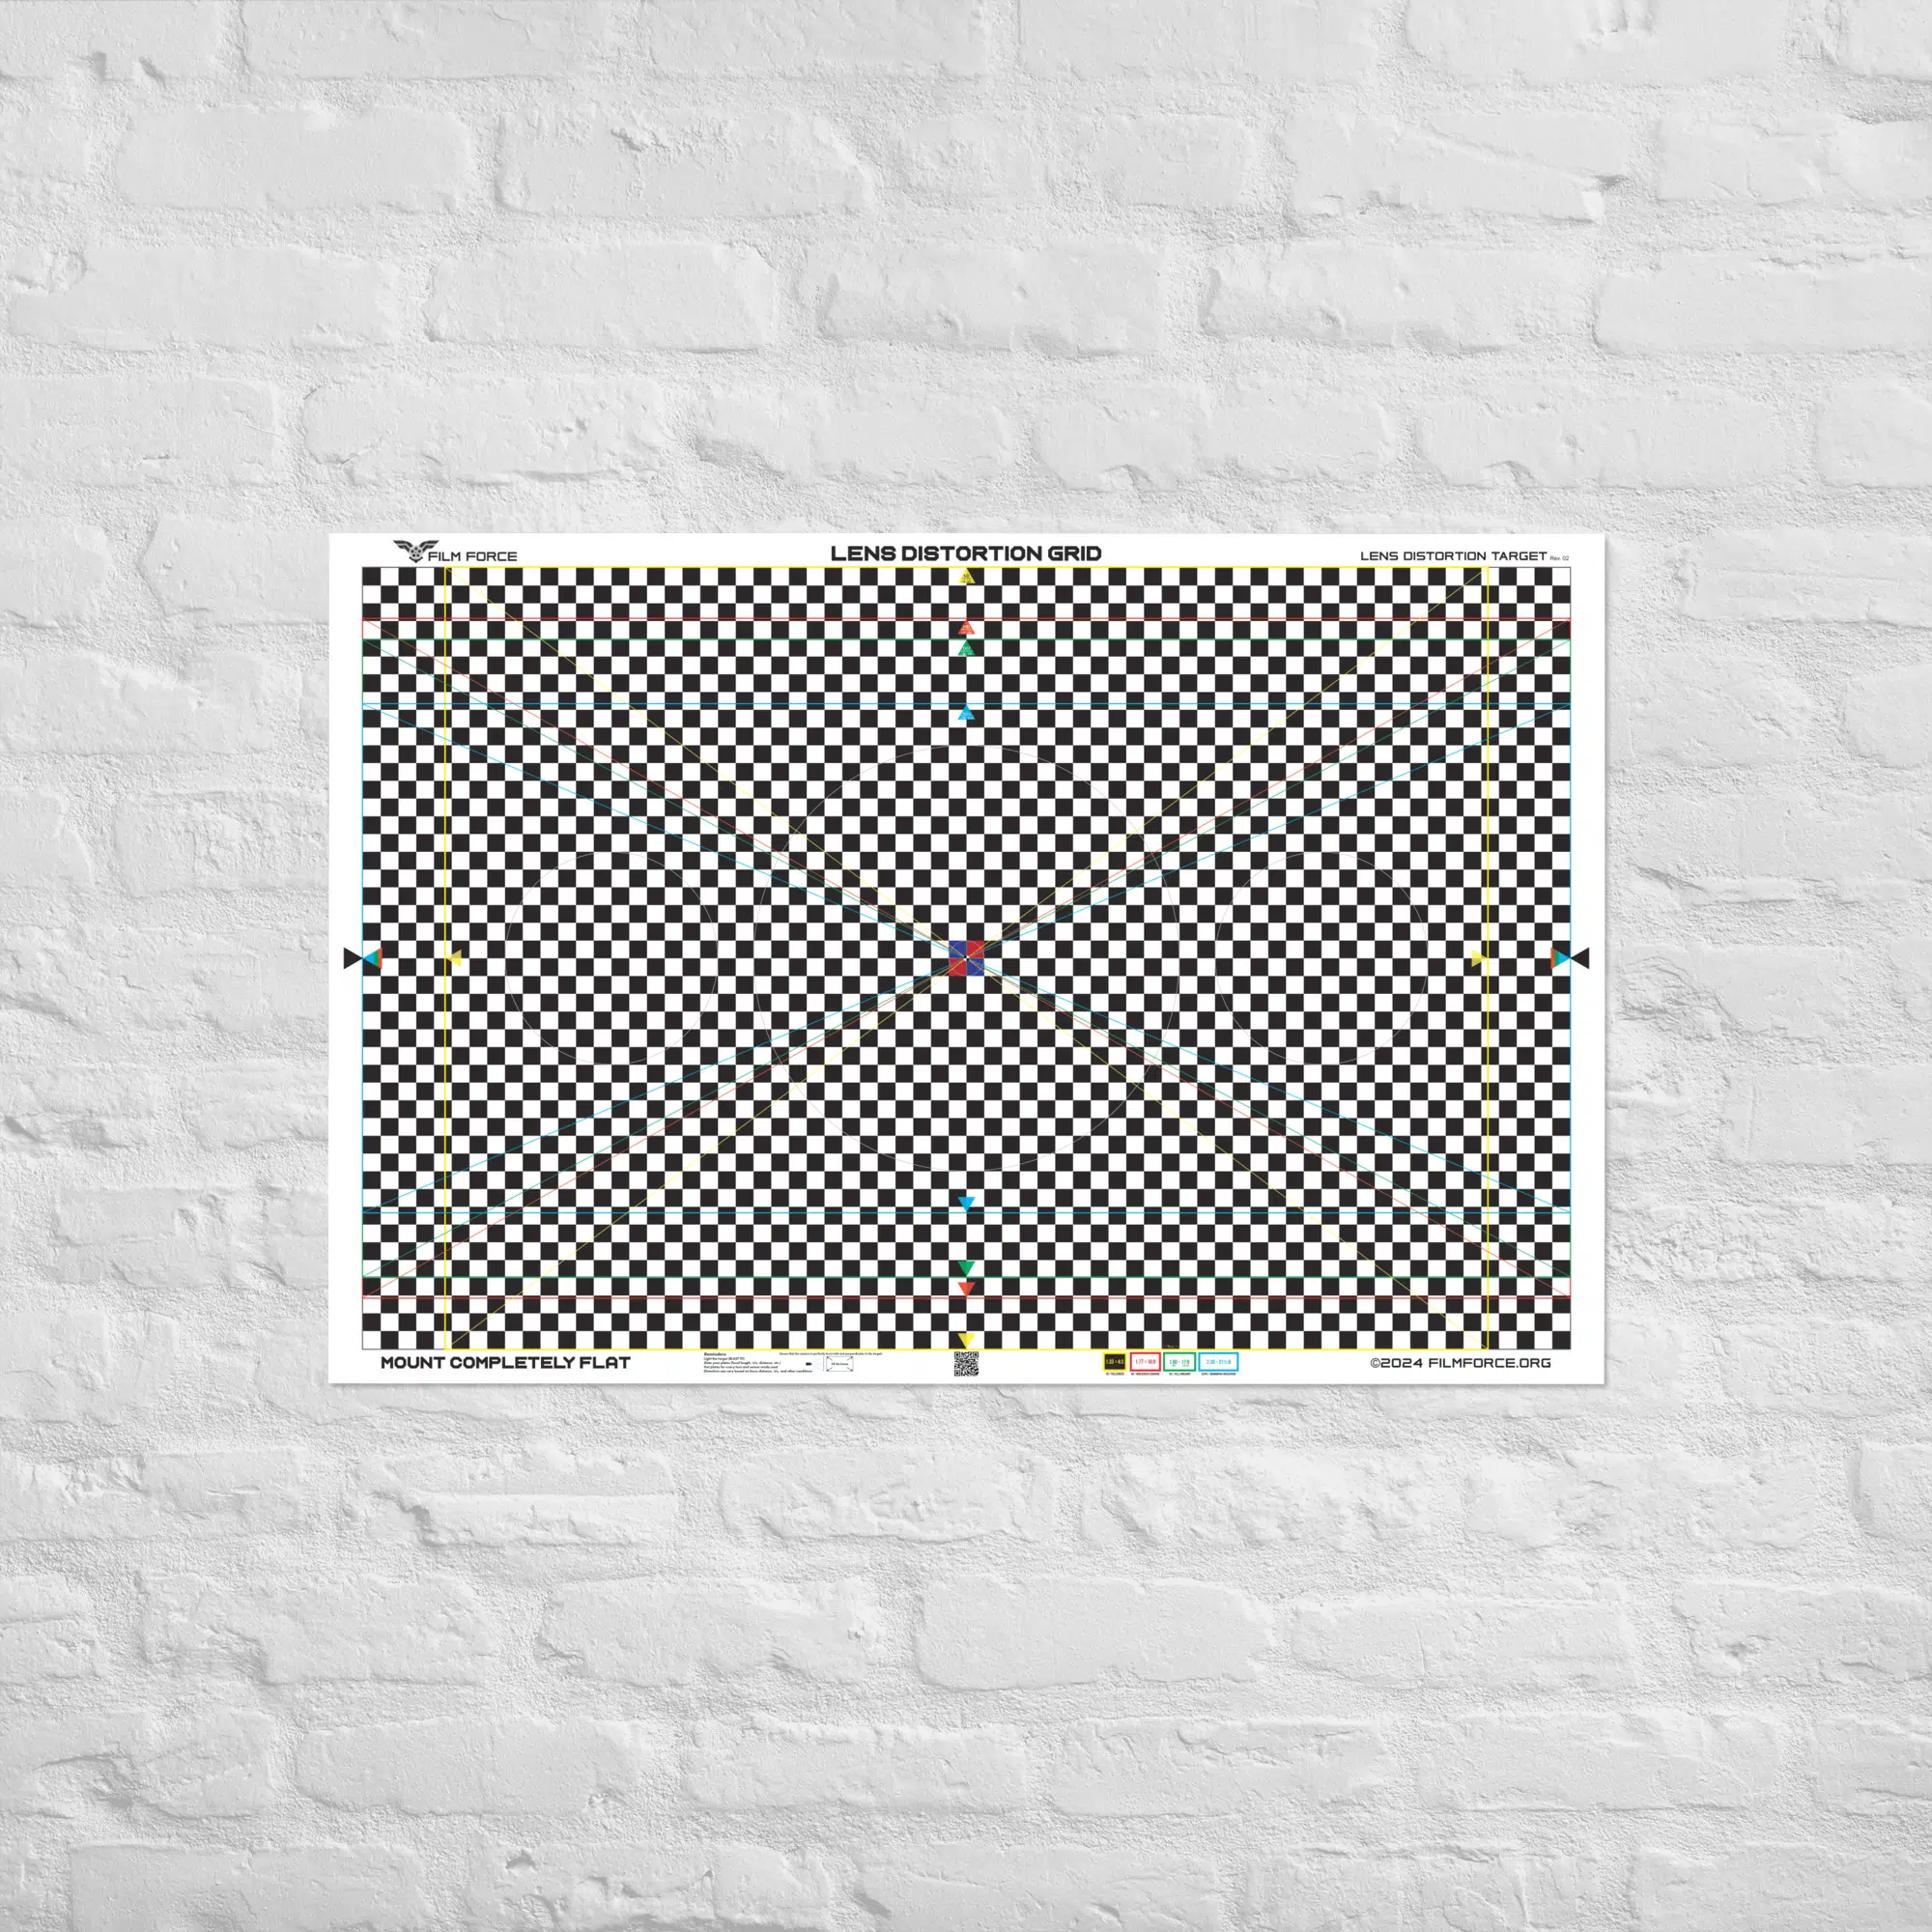
Make your VFX team happy with clean plates from our lens distortion grid! This lens target was designed in-house to help simplify the process of shooting distortion plates for both the camera and visual effects departments. Lens distortion checker charts are a crucial asset for any VFX-heavy project, especially when working with anamorphic lenses.
Our lens distortion chart measures 36″x24″ and is printed at a high resolution with superior contrast on a heavy, museum-quality matte paper sourced from Japan.
Original price was: $40.00.$35.00Current price is: $35.00.
Map the distortion of any lens with this handy VFX Lens Distortion Grid. Get crucial information to your post-production team in the form of these plates. When shot properly, lens distortion grids are crucial charts used to help VFX artists and compositors understand the distortion characteristics of a unique lens and sensor combination. By mapping and undistorting the image at the beginning of the workflow, and then applying that distortion back onto the final product, the match-moving and compositing
Lens distortion is particularly notable in anamorphic, vintage, and fisheye lenses. This distortion makes it harder for some tools like camera tracking, and it also makes superimposed images appear linear as they move across the frame, instead of distorting along with the rest of the image.
Our target was designed in-house and includes frame guides for SD (4:3), HD (16:9), DCI / Full Container (1.85), and Scope (2.35) aspect ratios to help hone-in the setup to get your camera perfectly centered with the target. Each square is ½ inch in width/height, and the chart measures 36″ x 24″ in total. In the margin underneath the grid are instructions and tips for shooting the lens distortion plates.
Setting Up your Lens Distortion Grid
We’ll ship this rolled up to save space, but you’ll need to mount the target to a FLAT SURFACE. Any slack in the surface of the chart could cause parts of the grid to mistakenly appear distorted, so do not use foam core, posterboard, or any other material that could warp. The best option is a flat piece of MDF or other rigid board with milled wood like 2×4’s forming an X shaped brace on the back. Then, clean the front of the board and adhere the poster to it, making sure to remove any air bubbles or creases. After being assembled this way, you can mount it on a C-Stand for ease in aligning the camera to the plate properly.
Our how-to video is coming soon!
Museum-quality poster made on thick matte paper.
• Paper thickness: 10.3 mil
• Paper weight: 189 g/m²
• Opacity: 94%
• ISO brightness: 104%
• Paper is sourced from Japan
This product is made especially for you as soon as you place an order, which is why it might take us a bit longer to deliver it to you. Making products on demand instead of in bulk helps reduce overproduction and unnecessary shipping, so thank you for making thoughtful purchasing decisions!
Additional information
| Weight | 0.11 lbs |
|---|
Reviews